-
Change the color of an element
Imagine being able to change the color of a garment in two strokes of a magic wand...
Impossible in real life but very easy thanks to Photoshop!
Level of difficulty: easy
Made with CS6 but applicable to all versions from CS4.
Material

• STEP 1
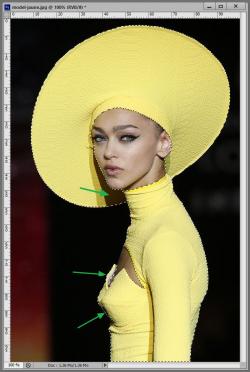
Open the provided image.
Select the model's hat and dress, taking care not to forget the details (see the green arrows) but if you do, don't panic! You can always improve the contours of the mask at the end of the work.
• STEP 2
Forget the "old school" color replacement, sometimes random! Long live the adjustment layers!
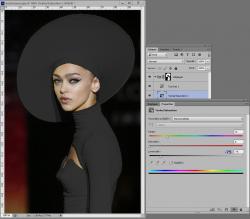
Click on the icon at the bottom of the layers palette
1. Select the Hue/Saturation setting.
2. Proceed in the same way to create a new Curves adjustment layer.The problem is that we now have 1 mask for 2 adjustment layers.

We will therefore create a group on which the mask will be applied.
3. Select the 2 adjustment layers and press Ctrl+G.
4. Select the mask thumbnail and move it to the group bar, then delete the mask from the Curves layer.
You should get this: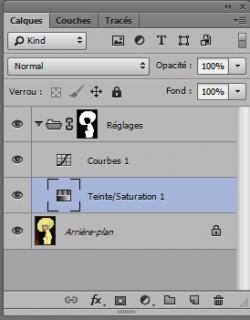
• STEP 3
Let's get to the fun part: the color change!
1. Double-click on the Hue/Saturation layer thumbnail.
A new window will open.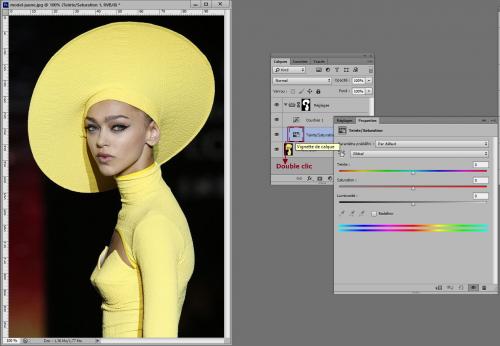
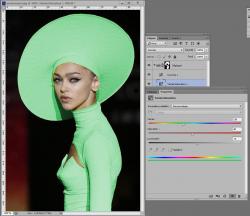
2. Check the Colorize box and then play with the slider to change the color.
You can also play with the Saturation and Brightness to adjust the image to your needs.
Here are some examples.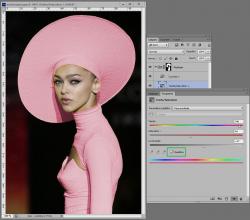

Changing the color is therefore very easy.
But then, what is the purpose of the Curves adjustment layer?• STEP 5
The Curves allow you to play with the alpha layers of the image, from absolute black to white.
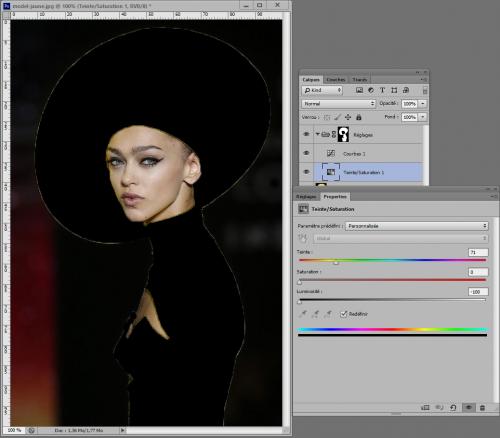
They can be used on the previous examples, but it is especially when we want to dress our lady in black (or white) that they will allow a more realistic finish.
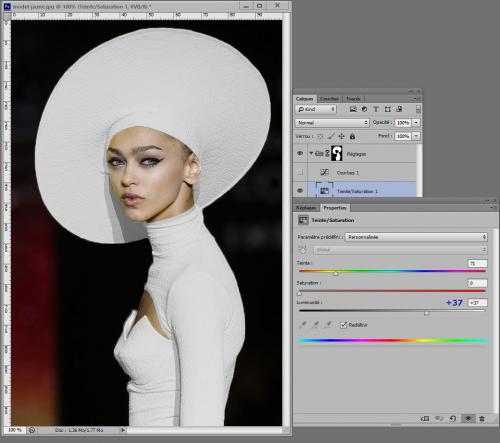
Let's dress our model in black and see what happens.1. Let's lower the Saturation and Brightness to the maximum to get a nice black.
Let's be honest: it's filthy!
The mask is far from clean, and the black is not realistic at all!2. Let's correct the mask:
Activate the Dodge Tool → light tones → 25% and pass the tool over the visible yellow parts.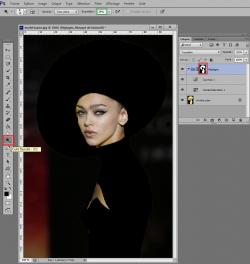
Let's get back to the basics: correcting the black of the garment.
3. Double-click again on the Hue/Saturation layer thumbnail and play with the Brightness values. Enter the value -75.
It's better but it looks like it's been through the washing machine 15 times!
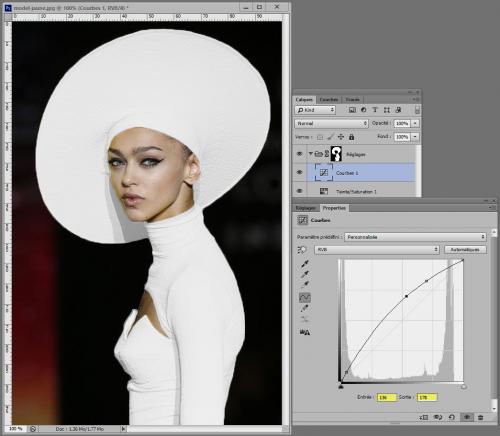
That's where the Curves come in.4. Thanks to the Curves, we will both intensify the black on the dark parts of the model and adjust it to the gray levels of the model (remember that we are working on the alpha layers).
Double-click on the Curves layer thumbnail and set the grayscale curve as below.
(To see the difference, you can turn off the layer).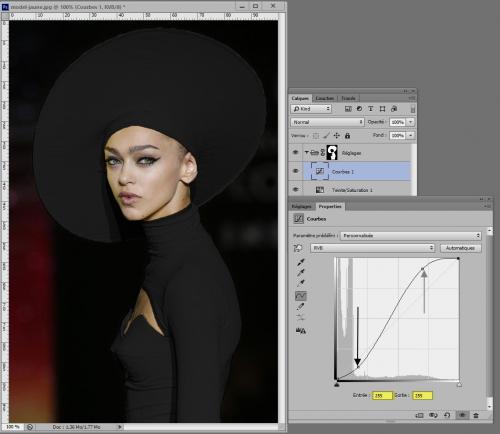
• STEP 6
Let's see if the white looks good.
The principle is the same but in reverse, we will increase the brightness on the Hue Saturation adjustment layer and adjust the Curve to decrease the darkest values and adjust the gray values in a realistic way.
Let's see it in 2 screenshots now that you understand the principle.Changing the brightness
Curve modification
Het is aan jou om met de verschillende instellingen te spelen!
Met een beetje oefening duurt het maar een paar minuten.
-
Tu aimes ce blog ?
Un clic pour l'encourager, c'est gentil !
-

-
 Clic and translate
Copy and past the URL then refresh the page for correct display. -