-
Tuto Rêve de Neige ENG
MATERIAL :

Background image from the Net
Brushes from my archives (site closed)
Personal gradients and tubes (do not share)
• BEFORE YOU START
Load brushes and gradients in your libraries and install them
Change the unit of the rules to %.
All images are in high resolution: click to see screenshots.STEP 1
• Create a 1024 x 768 px document
• Open the winter landscape image and drag it onto your workspace without resizing it. Name this layer Landscape.
Position it as below, aligning it with the bottom marker.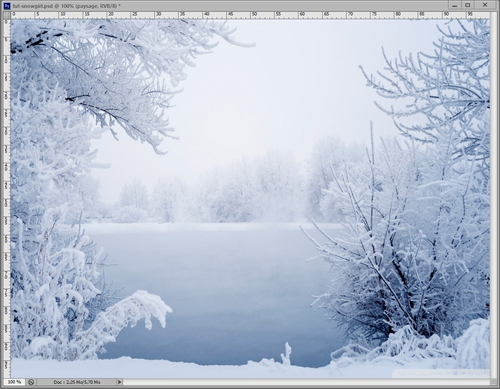
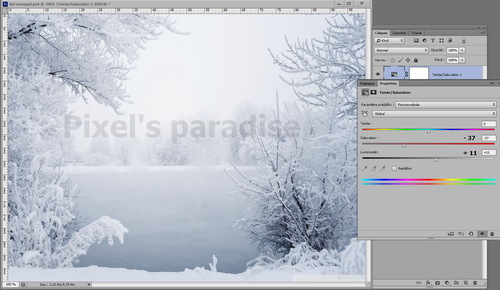
Using adjustment layers and blend modes, we're going to change the colors.
You can either click on the round icon at the bottom of your layers palette, or go through the Layer → New Adjustment in Layer menu, or through your Adjustments panel on the right if you have it enabled via the Windows menu.• Hue/Saturation
• Curves
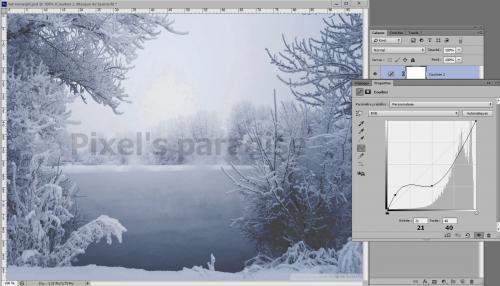
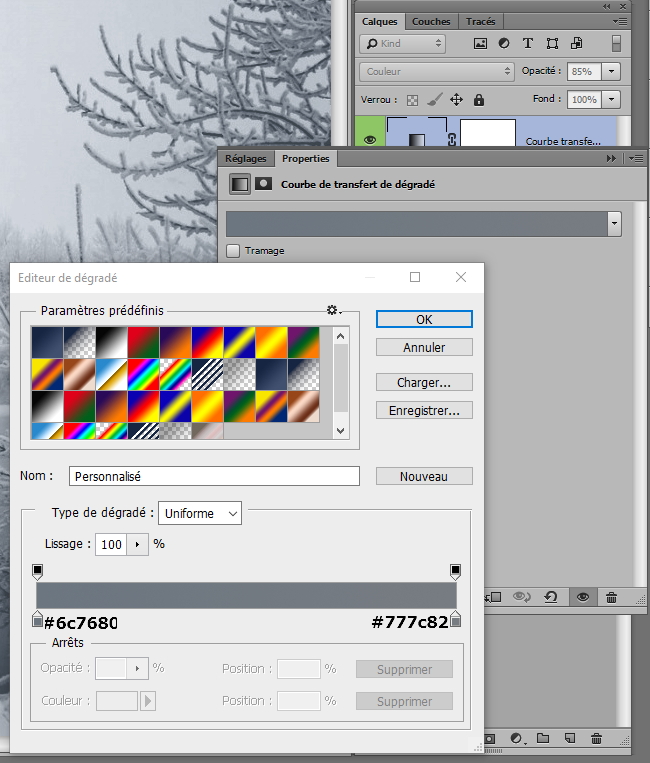
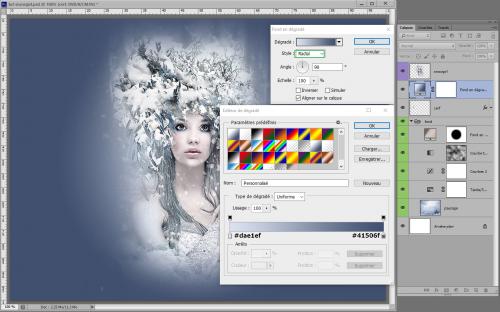
• Gradient map (Gradient transfer curve)
Open a new Gradient map adjustment layer, double-click on the layer label and enter the following data

• Switch the layer to Color blend mode and reduce the opacity to 85%.
• Deactivate the link between the layer thumbnail and the layer mask thumbnail, then move to the layer mask thumbnail.
• Go to the menu Filter → Render → Clouds.
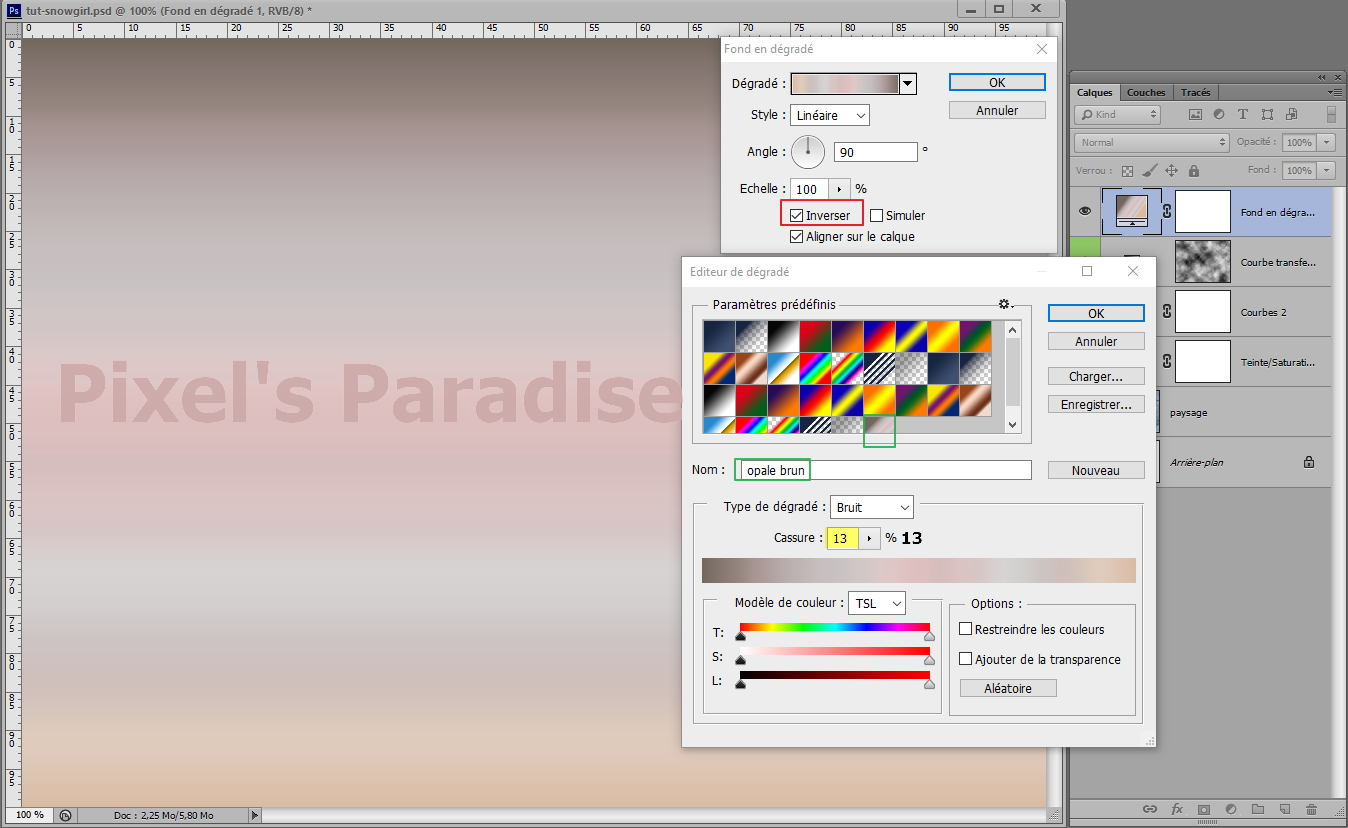
• Now create a Gradient fill layer.
Select the Opal Brown gradient, provided in the material, invert it.
• Switch this layer to the Soft Light blend mode.
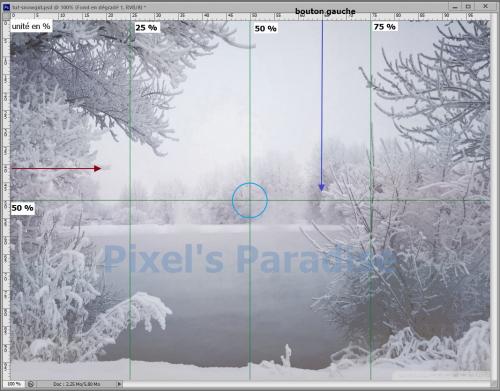
We will now make an ellipse selection in the center of our image. We can work at a glance but here is a more reliable and easier way.
• Activate the Move tool. Make sure that the unit of your Rulers is the percentage.
• Position the cursor on the horizontal ruler. While holding the left mouse button, draw a horizontal marker at 50% height.
• Do the same to draw vertical marks from the vertical rule at 75%, 50% and 25%.
• Disable the link between the two layer thumbnails and position the mouse on the mask thumbnail.
• Activate the Selection Ellipse tool (M) - Progressive contour: 0px and smoothing activated.
Starting from the intersection of the 2 central markers, make the selection by holding the Shift and Alt keys to center it perfectly, going to the lateral markers.• Go to the Select menu → Save selection under the name Center.
• Still in the menu Select → Modify → Feather at 20 px.
• Go to the menu Edit → Fill → Black.

• Deselect (Ctrl+D).
STAPE 2
• Open the render Snowgirl and drag it onto your working document, positioning it between the side marks.
• Type Ctrl+: to disable the markers.
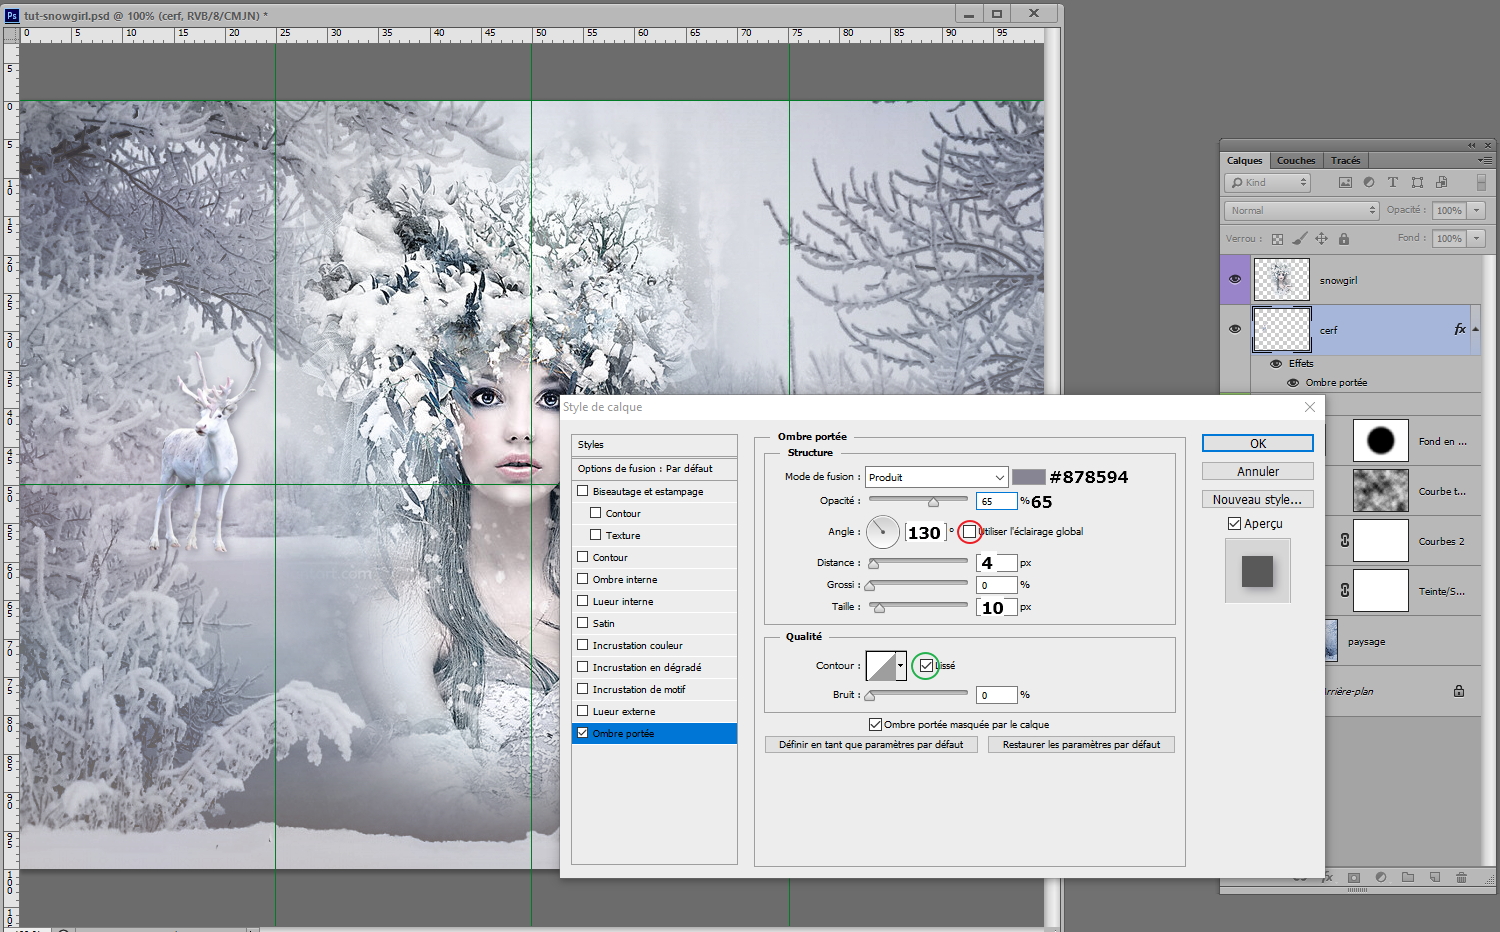
• Open the White Deer tube and drag it onto your workspace. Place the layer under the Snowgirl layer.
• Resize it (Ctrl+T) to 25%, remembering to activate the link to preserve the ratio.
• Apply a Drop Shadow with the following settings (blending mode : Multiply) and reposition the layer.
STAPE 3
• Under the White Deer layer, create a Gradient fill layer:
• On the Snowgirl layer, activate a blend mask
• Menu Select→ Load "center" selection → check the Invert box.
With a black brush, erase the bottom of the tube.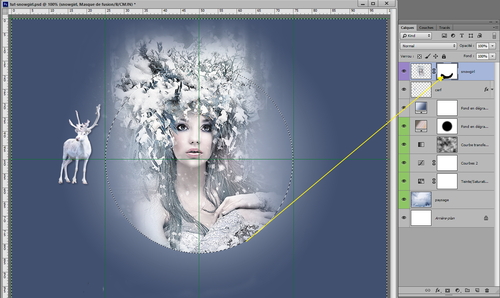
• Without deselecting, go to the Gradient Background layer then go to Edit → Fill → Black
• Switch the layer to the Multiply blend mode - Opacity: 50%.
Invert the selection (Shift+Ctrl+I).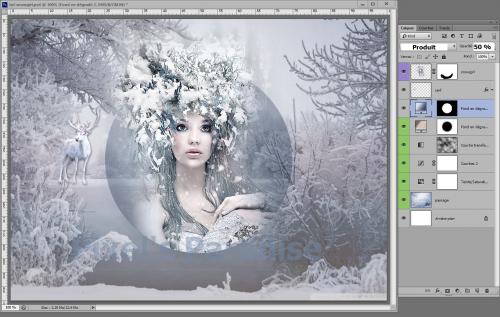
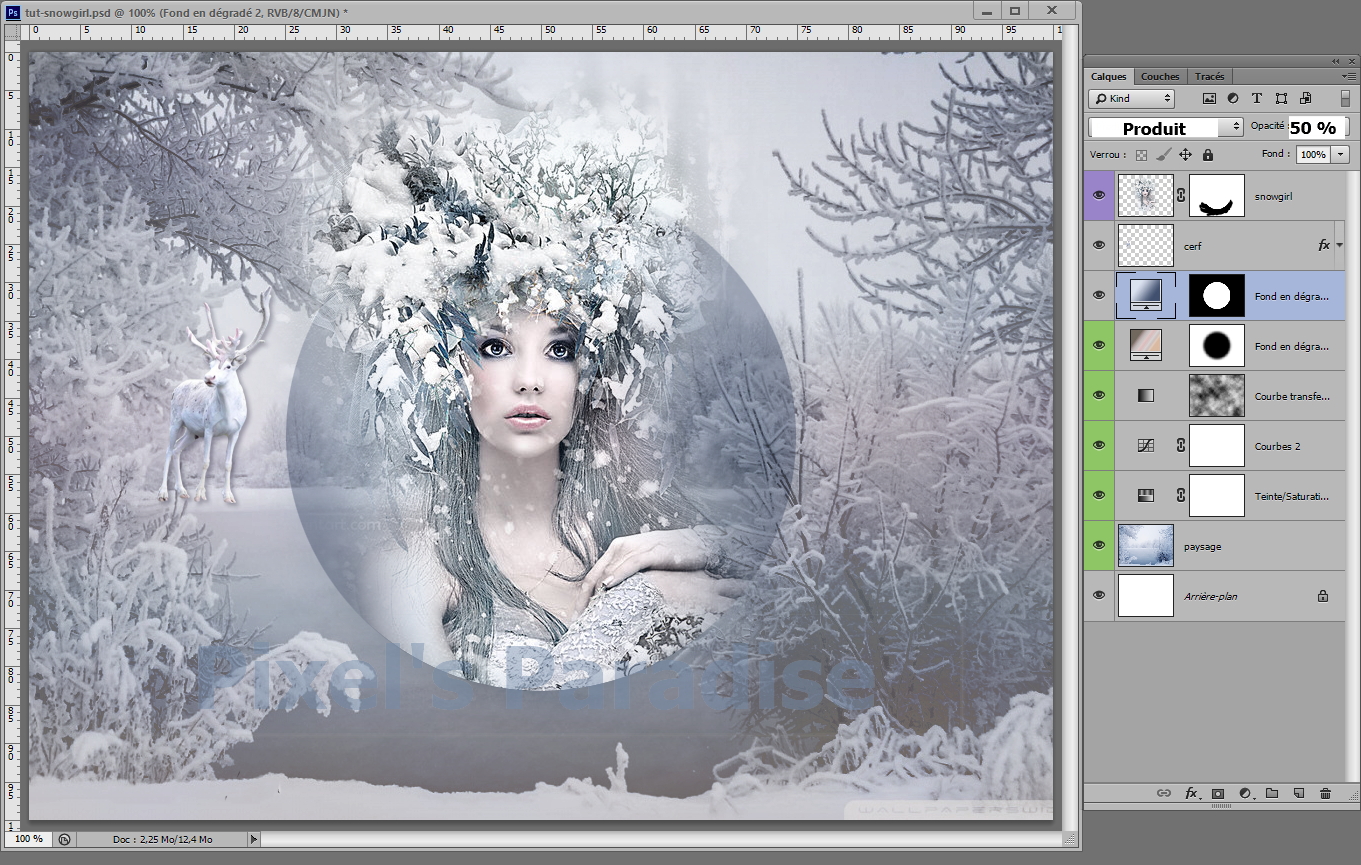
• Under the Snowgirl layer, create a new layer, name it Round Frame
• Foreground color: #bbc7e3. Check that the selection is still active.
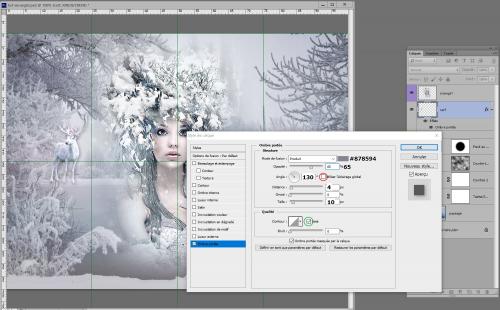
Menu Select → Modify → Border: width 2 px.• Go to menu Edit → Fill → Foreground Color. Deselect.
Apply the following Stroke layer style: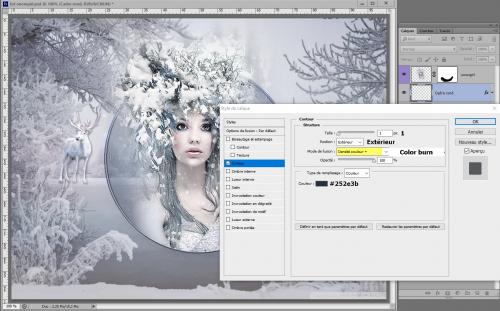
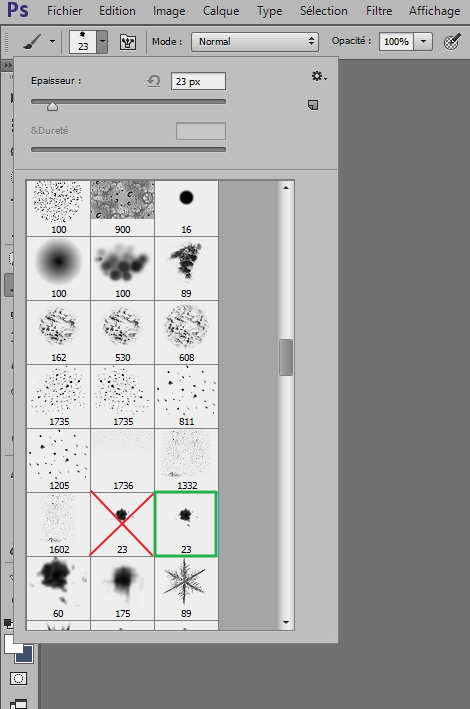
• Create a new layer, name it Snow.
In the brushes pack provided, select the 2nd brush winter 23 : it is preset by its creator, do not modify the parameters.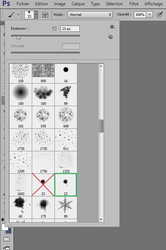
• Retrieve the center selection. Go again to Selection → Modify → Contract by 4 px.
Go again to Selection → Modify → Feather: 10 px• Paint the snow. Deselect.

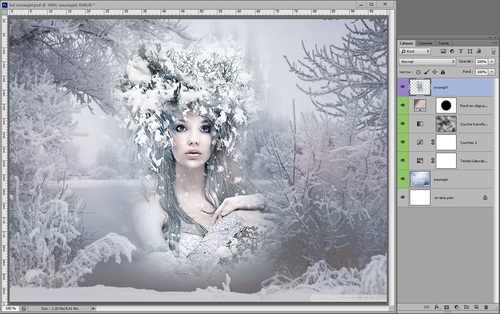
 I often recommend that you don't merge layers until you have to, and only do so after you have duplicated the layer(s) involved.
We are almost at the end of our work, but I want to make a change. At this point, it would be impossible if we had merged our layers.Let's demonstrate by example.
STAPE 4
Now that all the elements are in place, the background seems a little too dark. There are several ways to change this, but we will do a very simple manipulation.
• Go to the layer of the first gradient Background (green thumbnail).
Having used a fill layer, it's easy to modify it: double click on the layer thumbnail and replace the Opal brown gradient by the Opal grey pink gradient (provided).
• Select the layers composing the background (green thumbnails) and put them in a group by typing Ctrl+G. Name the group Background and duplicate it.
• Go to the group Background copy → right click → Merge group (context menu)
• Switch the resulting layer to Screen blending mode - Opacity 40%.

• Reactivate the guides by pressing Ctrl+: and create a layer mask.
• Activate the Gradient tool - Linear - Black tool in the foreground.
"Pull" the gradient from the top edge to the center marker while holding down the Shift key for a straight gradient.• Retrieve the Center selection.
Go to Edit → Fill → Black.Now, it's time for a coffee !
-
Tu aimes ce blog ?
Un clic pour l'encourager, c'est gentil !
-

-
 Clic and translate
Copy and past the URL then refresh the page for correct display. -